
Free Custom Email Address
#howto #improvmx #emailforwarding Oct 10, 2019 4 minTable of Contents:
I want to have a custom email address using my domain but my domain registrar (Namecheap) can’t do email forwarding when using custom DNS. I’m not using their DNS because I’m deploying my site on Netlify. I don’t want to pay for G Suite just to have a custom email address so I searched Google Duckduckgo and found a Gmail-based solution.
When a sender sends an email to my custom email address, it will go first to Namecheap then it will look at its DNS which is pointed to Netlify. Netlify is using ImprovMX’s mail servers so ImprovMX will forward the email to my Gmail email address.
To give you a better picture, look at the diagram below.

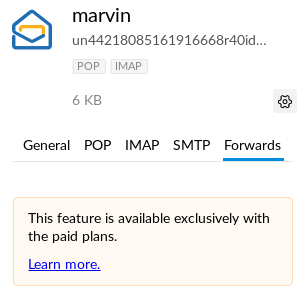
Previously, I’m using Zoho to do this but I stopped using them after they moved the email forwarding feature to paid plan.
Below are the best alternatives for free email forwarding service:
- ImprovMX (free)
- Forward Email (free and open-source)
- Mailgun (free up to a certain limit)
I decided to go with ImprovMX since they provide aliases, multiple destinations, logs, and webhooks. I also find the setup for it very easy. This is how I configured it.
Receiving email
Step 1. Use Netlify’s DNS
Configure Namecheap custom DNS and use Netlify’s DNS.
Login > Domain List > Manage

Step 2. Create ImprovMX alias
Go to https://improvmx.com/, put your domain name and Gmail email address then click Create a free alias

After clicking the button, you will be instructed to configure your MX record on your domain.

Step 3. Add MX records
Login to Netlify, click the site, go to Domain settings then Go to DNS panel

Now we need to add 2 new MX records here. Click the button Add new record

MX Record 1
| Field | Value |
|---|---|
| Name | @ (will automatically set marvintan.com as the host name) |
| TTL | leave blank (default: 3600 seconds) |
| Type | MX |
| Priority | 10 |
| Value | mx1.improvmx.com |
MX Record 2
| Field | Value |
|---|---|
| Name | @ (will automatically set marvintan.com as the host name) |
| TTL | leave blank (default: 3600 seconds) |
| Type | MX |
| Priority | 20 |
| Value | mx2.improvmx.com |
Let’s verify MX records were added.

Step 4. Test email forwarding
Let’s go back to ImprovMX website and send a test email.

If it shows “Waiting for DNS propagation” click CHECK AGAIN until it shows Email forwarding active

We can now click TEST and check if it will reach our Gmail inbox.

If you received an email the same as above, it means that any email sent to your custom email address will now be forwarded to Gmail.
Sending email
Now, we need to make sure that we can also send email using our custom email address.
Step 1. Enable 2-Step Verification on your Google account
First, you need to have 2-Step Verification enabled for your Google account.

Click here to enable 2-Step Verification. You will see a welcome page like below. Click GET STARTED and follow the instructions until you complete the steps.

Once completed, it will verify if you want to turn it on. Click TURN ON.

Step 2. Create an App Password
After enabling 2-Step Verification, App passwords will now show below.

Click it then select Mail as app and Mac as device. (select it even if you are not using Mac.)

Click GENERATE, take note of the code then click DONE.

Step 3. Add your custom email address to Gmail
Go to Gmail > Settings > Accounts and Import
Click Add another email address you own under “Send mail as”.

After clicking, a pop-up window will open. Set your custom email address and your sender’s name. Untick “treat as an alias” then click Next Step.

Input the details below:
| Field | Value |
|---|---|
| SMTP Server | smtp.gmail.com |
| Port | 587 |
| Username | Gmail email (including @gmail.com) |
| Password | App password |
| Connection | TLS |

Step 4. Confirm ownership
You will receive an email from Gmail asking you to confirm ownership. Just click the link to confirm. You can also go to Gmail > Settings > Accounts and Import and confirm the custom email address under “Send mail as” section by entering the code provided in the email.

That’s it. You now have a working custom email address! It will help you build a better reputation for your clients as a professional or even a startup company. All you need is a domain name. No need to get G Suite.
If ever you notice that you are not receiving any email or you can’t send an email, you can always check ImprovMX status page.
Have you tried any other free email forwarding service? Please feel free to share your experience in the comment section. I’m not sure how to benchmark this so we can determine who got the best email forwarding service out there. For now, I’ll stick with ImprovMX. Thank you for reading. Cheers!